Case in point: I’d been trying to finish up my Christmas ornaments but then I got sidetracked by a clever idea to make small decorative gift bags to put them in. I bought a couple of packs of candy/treat bags at the dollar store with the intention of using them to package fudge, but I took one of the boxes apart at the seams and saw that it would make a simple template for handmade gift bags.
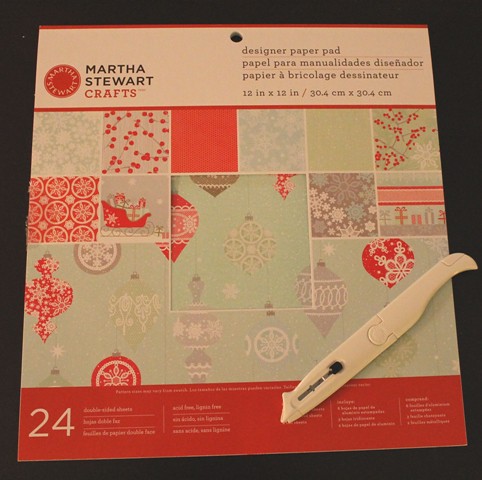
I bought a Martha Stewart Crafts Designer Paper Pad (so pretty!), traced around the template onto the paper, and then cut it out with scissors. I then used the bone folder/utility knife to score and fold the paper in all the right places, just like the original bag.
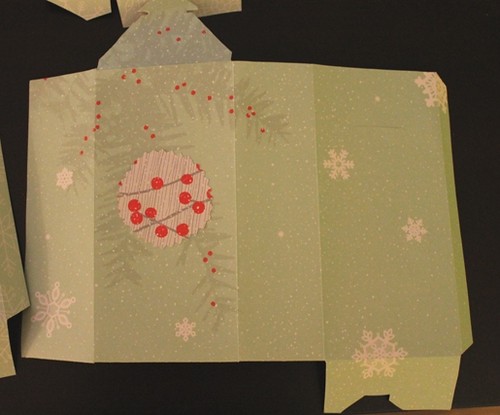
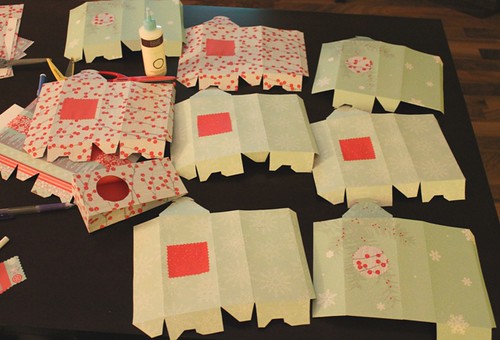
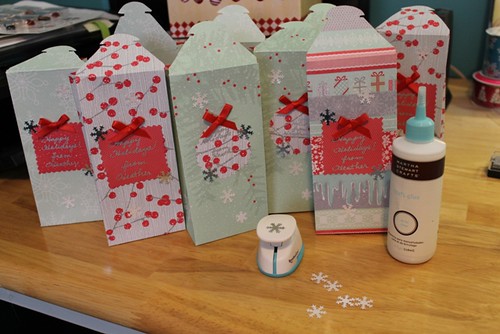
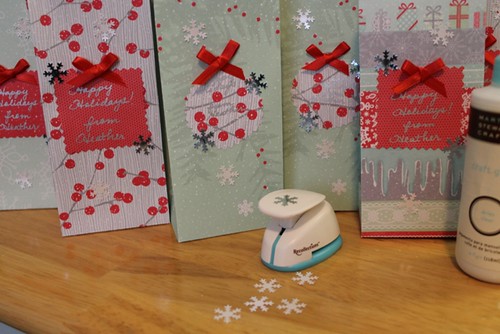
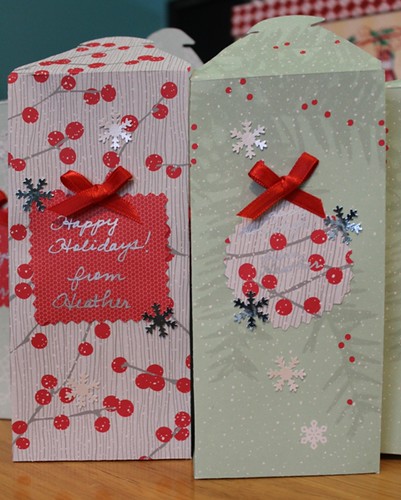
I made a bunch of bags using different patterns of paper. You can see in the photos above how the tabs are built in to the design and will fit together to form the bottoms of the bags. If you’re wondering why the bags have those funny peaked tops with notches in the sides, that’s the tab that tucks into a slot that I cut on the back of the bags to keep the top of the bags closed.
I used the contrasting scraps of paper to make tags, which I cut out with different types of pinking shears and glued on. I used a silver pen to add a holiday greeting. Then I glued the bags together using the Martha Stewart craft glue and let them dry before tying small red ribbon bows and gluing them on with a glue gun.
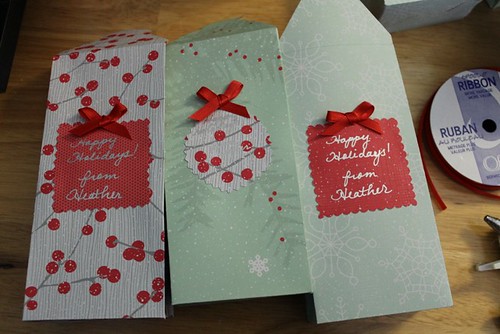
Finally, I used a small Recollections (that’s a Michael’s brand, I believe) snowflake punch to make silver embellishments. The great thing about the paper pad that I bought was that it included a silver finish sheet and a white pearl finish sheet, and I used those to make the little snowflakes. The finished bags are approximately 6.25" high (with the top flap folded over and tab secured in the slot on the back), 3" wide, and almost 2" deep.
This is my first real experience with paper crafting. I always swore that I would never get into scrapbooking type activities but I am starting to understand why people enjoy playing with paper; it’s so fun and addictive. I used Martha Stewart products because they were both beautiful looking and on sale at Michael's, and they were easy to use. However, I have no experience with other brands so I’m unable to offer a fair review. I can tell you that the Martha Stewart Crafts Utility Bone Folder is multiuse tool, which is convenient and clever with the way that the tools all fit together. It’s not too sturdy, though—the tip broke off when I applied pressure to score the paper. I think I’ll get the regular bone folder for more heavy duty work.
I’m very happy with the way the bags turned out, though. They’re almost prettier than the decorations I’m going to put in them.
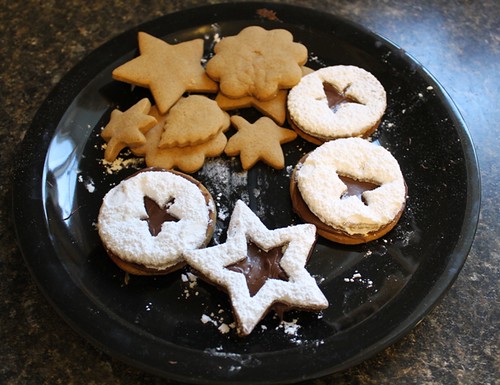
Now on to my baking. Because I have several baking projects lined up during the next few weeks that require gingerbread men of varying sizes for decorations, I decided to make them ahead of time using this Martha Stewart recipe. I doubled the recipe so that I could make extra cookies in different shapes. The only other change I made was to use half ground ginger and half ginger root grated very finely. The recipe makes really great cookies with just the right texture. They're not overwhelmingly gingery in taste but they smelled amazing while they were baking.
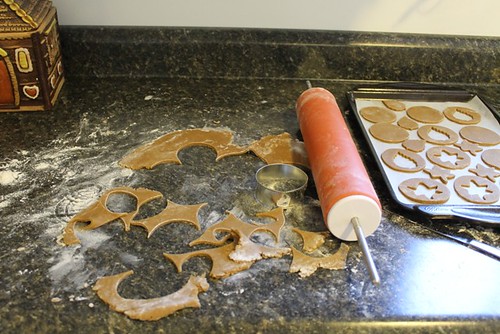
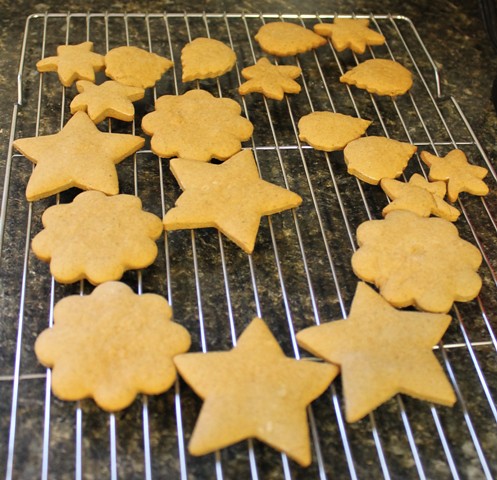
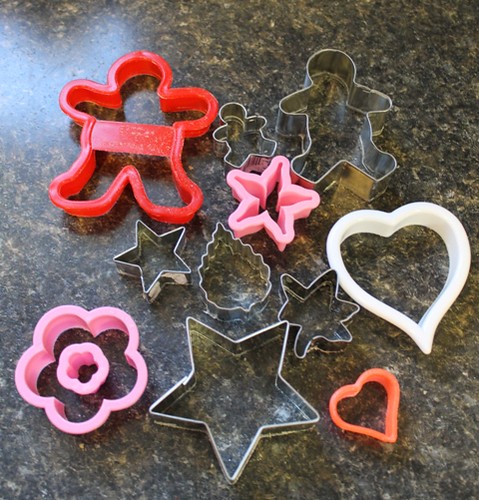
I used a variety of cookie cutters, some new and some old, to make different shaped cookies. The red gingerbread man cutter and the pinkish heart cutter on the bottom right were ones that my mother had when I was little. The bubblegum pink cutters are actually for cutting out fondant shapes and came with a Wilton cake decorating kit.
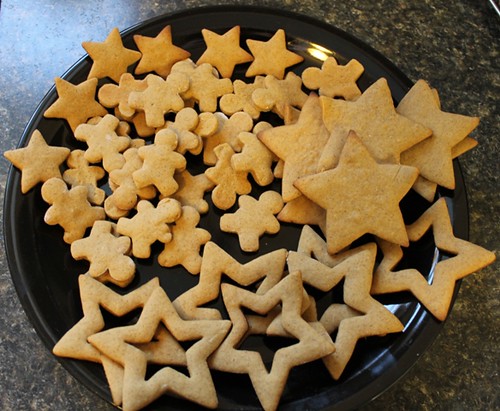
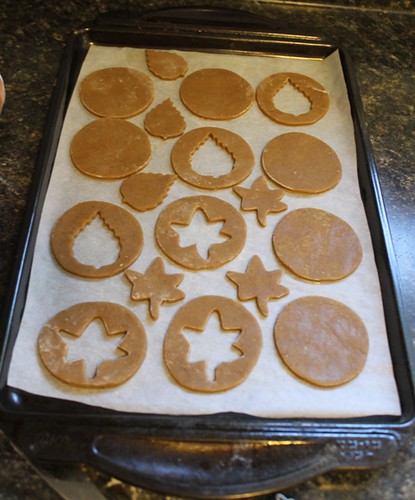
You probbaly noticed the star cookies with the cut-out centres. I asked myself, why stop at plain old gingerbread cookies when I can make gingerbread chocolate-hazelnut sandwich cookies? So, that’s what I did, but I made them in the style of linzer cookies. I love the look of linzer cookies with their little cut out windows that allow you to see the filling inside and the dusting of powdered sugar snow that surrounds them.
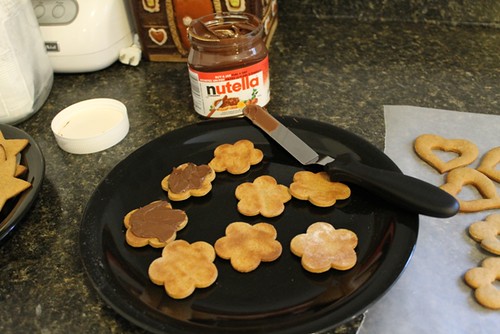
Instead of raspberry jam or other fruit preserves, which is more traditional in linzer cookies, I used Nutella. The combination of gingerbread, chocolate and hazelnuts is so Christmasy and delicious.
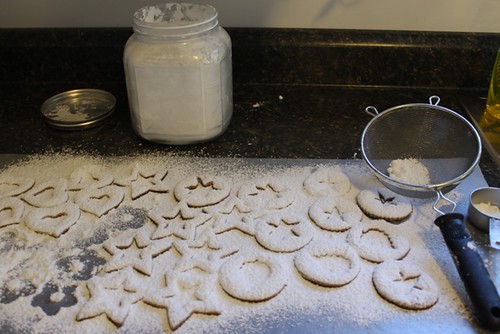
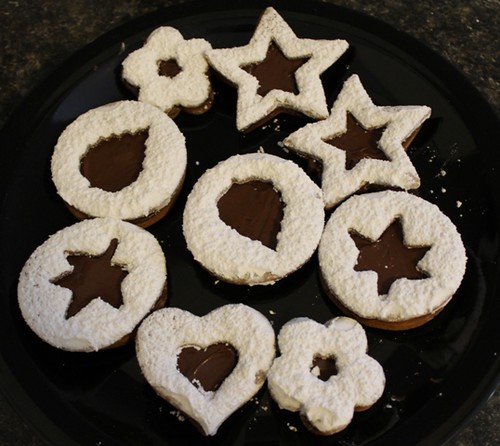
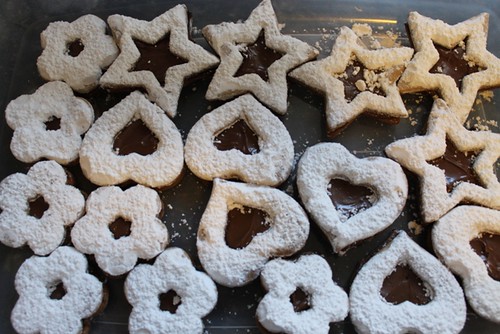
The powdered sugar isn’t really necessary—again, it’s what you do with linzer cookies, and it makes them look pretty and seasonal. The worst part is that the sugar can blow around and get into your cut-out windows, ruining the effect. The sandwich cookies would be just fine without the dusting of sugar. The messiness is totally my fault, though. I was a little heavy handed with the dusting. I also need a finer meshed strainer because the one I used was too big. A less aggressive approach wouldn't hurt, either. I need to learn to gently tap the strainer and not whack it because I'm in a hurry to shove cookies in my mouth. Patience is not one of my strengths.
Finally, here’s my plate of “reject” cookies, the ones I didn't want to share because they were a bit ugly, messy, burnt, and gooey from the extra Nutella oozing out around the sides. But I enjoyed them more than a bit. Yum.
No comments:
Post a Comment